Quaresimali Honey Almond Biscotti

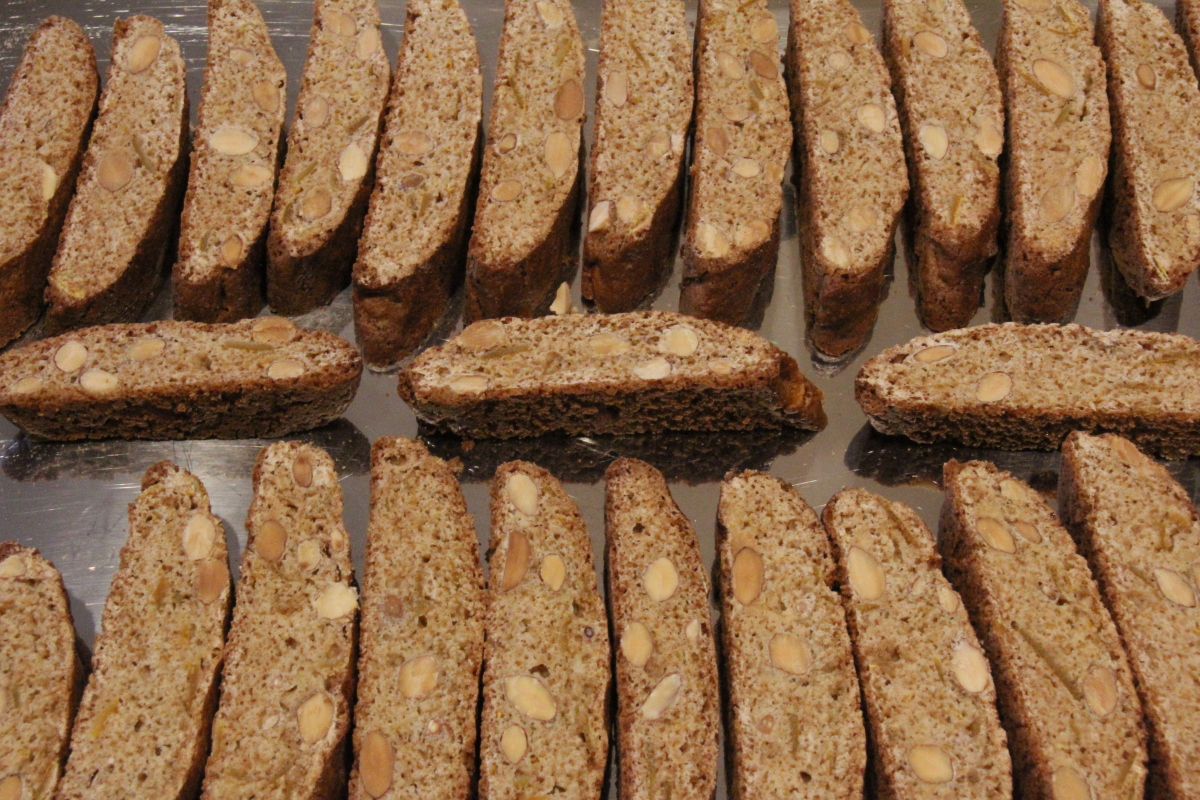
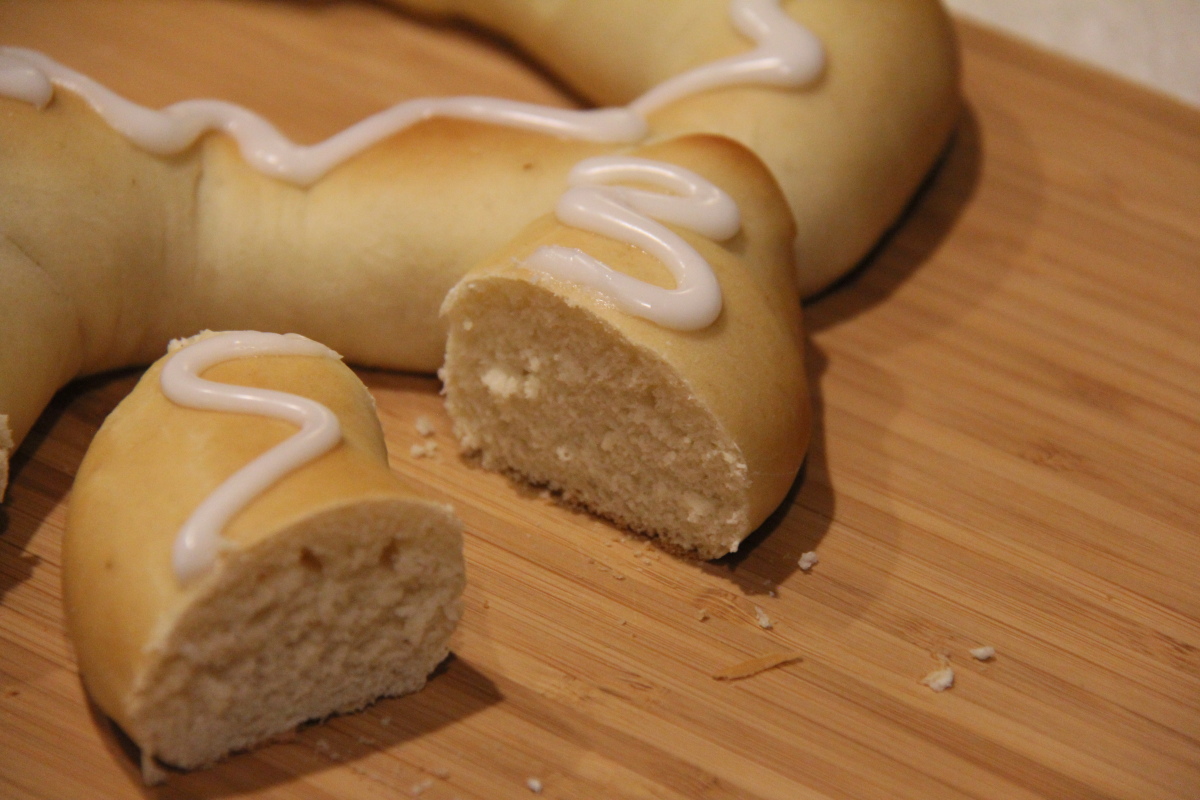
This variety has quite a different flavor profile and texture than our regular almond or pecan biscotti. The combination of the honey with the spices and citrus yields a more substantial texture and very complex flavor – warming and wonderful!

quaresimali honey almond biscot0018

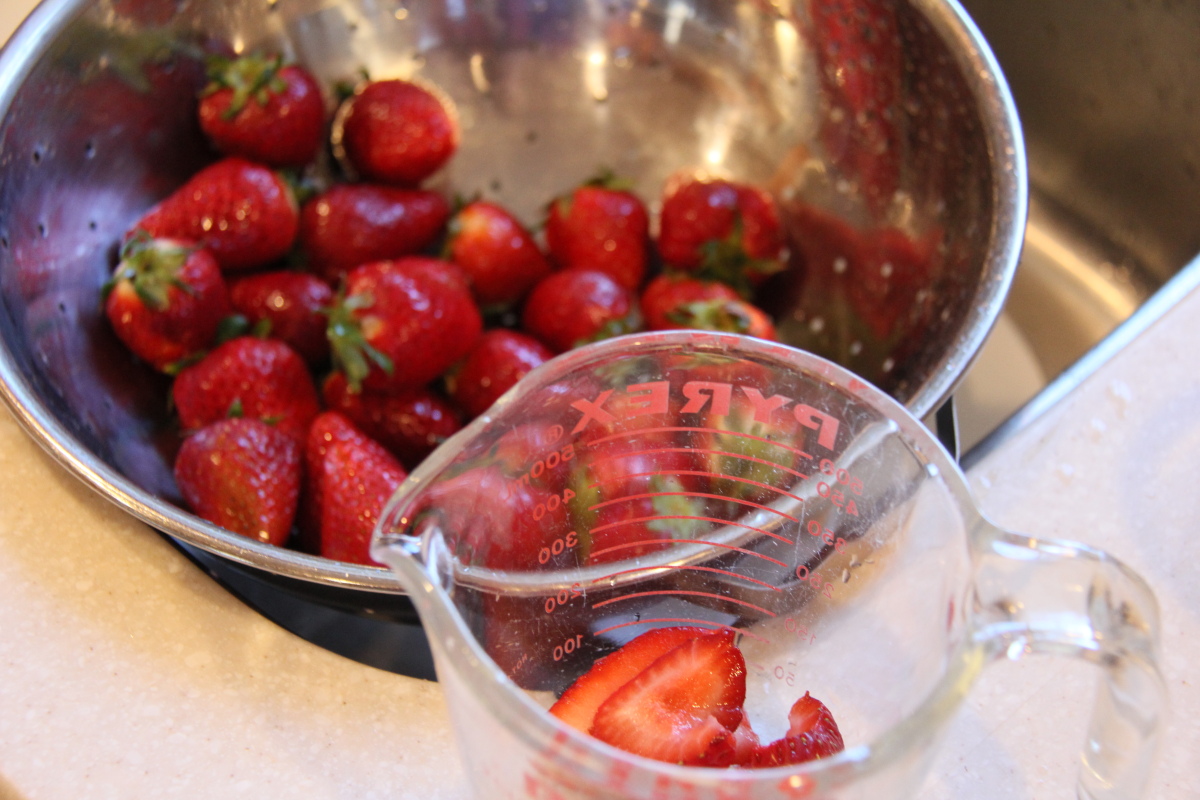
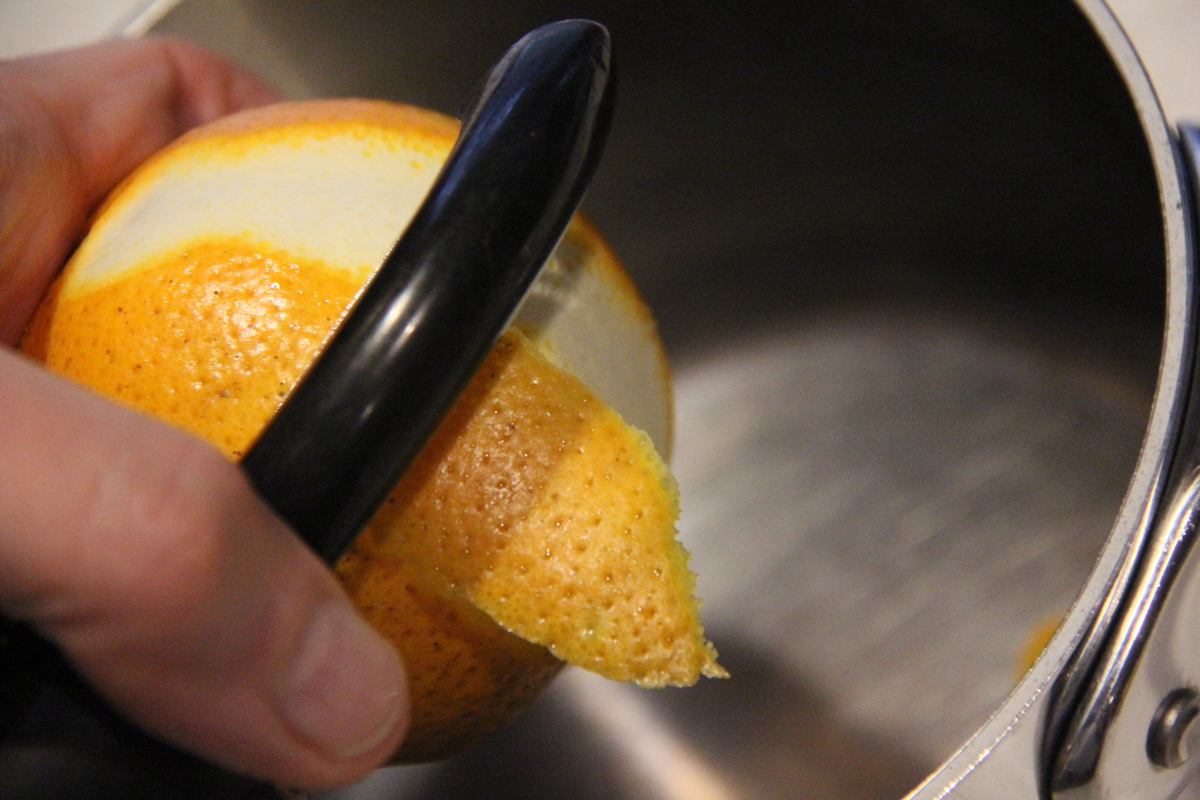
The first step is to make some candied orange peels. Of course you could buy them, but they are easy to make, so why not?

quaresimali honey almond biscot0001 quaresimali honey almond biscot0002

QUARESIMALI HONEY ALMOND BISCOTTI
  • 2 1/2 cups all-purpose flour
  • 1/2 cup granulated sugar
  • 1/2 cup brown sugar
  • 1/2 lb (1 1/2 cups) toasted almonds, roughly chopped
  • 3 eggs
  • 1/4 cup honey
  • 1/2 teaspoon baking powder
  • 1/4 teaspoon baking soda
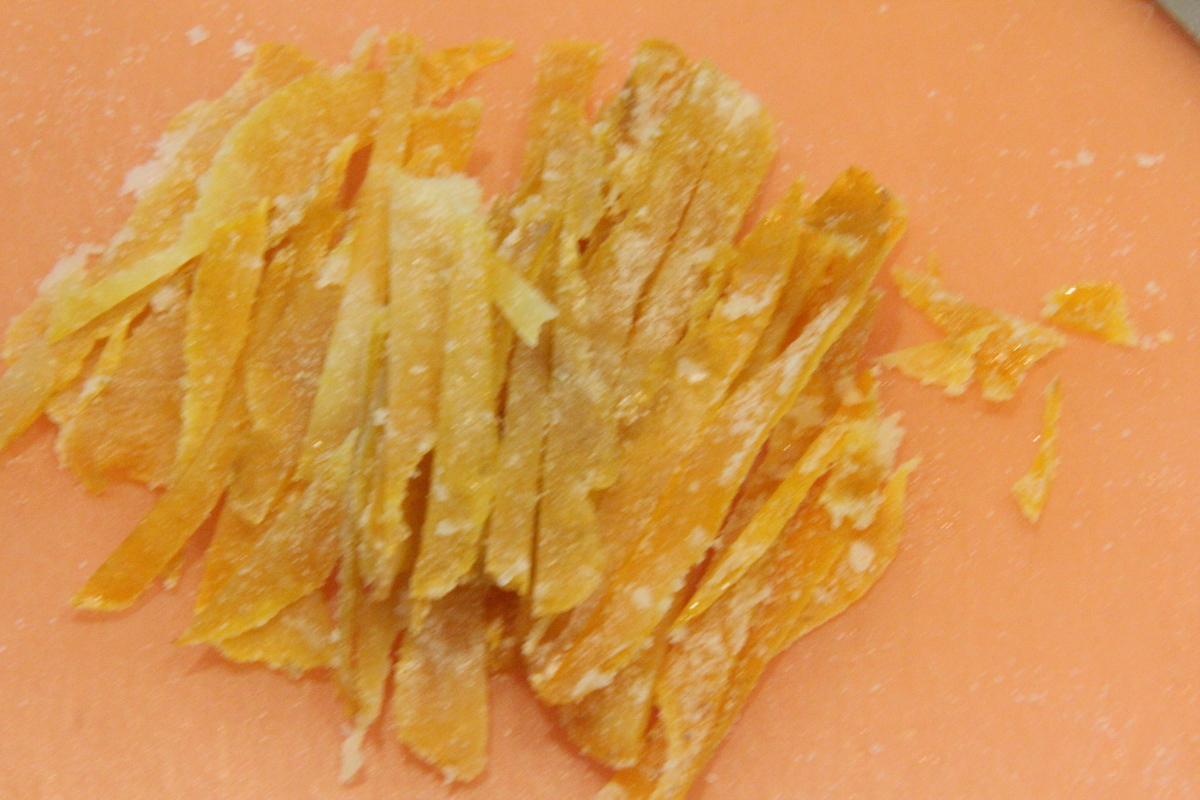
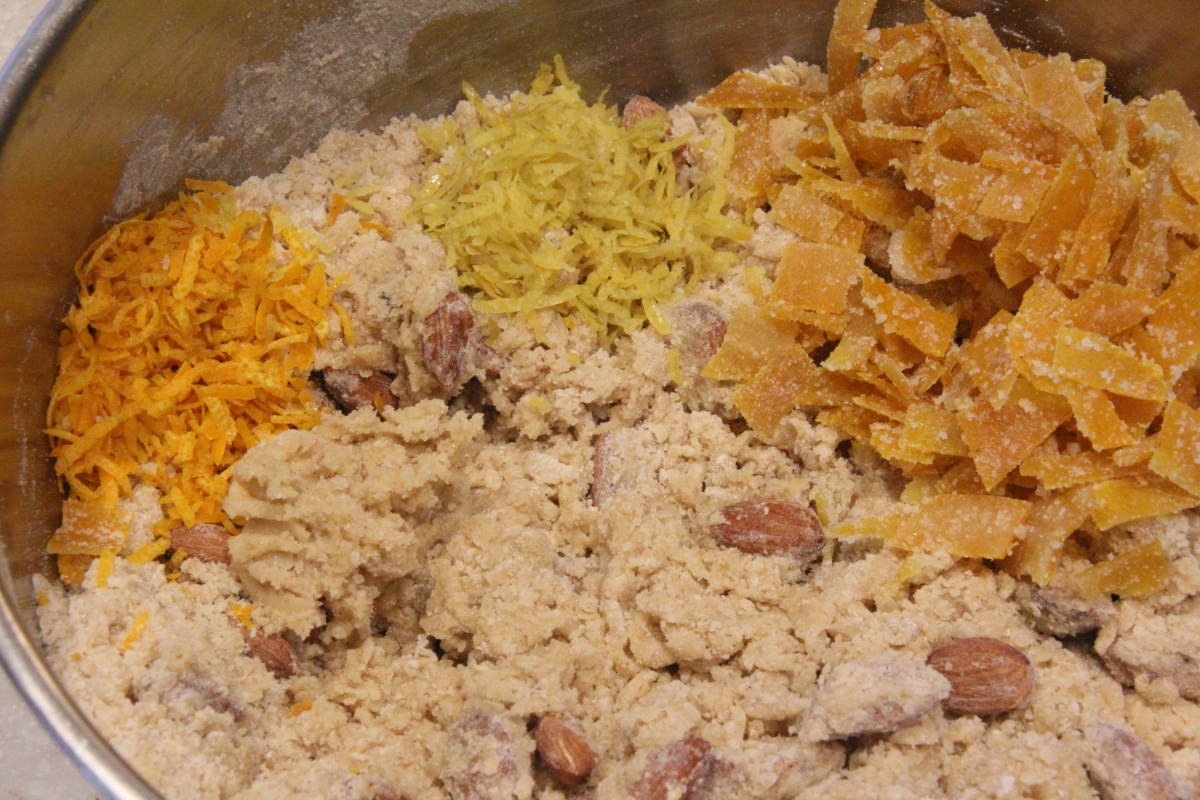
  • 1/2 cup candied orange peals, chopped
  • 1 teaspoon (1/2 orange) orange zest
  • 1 teaspoon (1/2 lemon) lemon zest
  • 1/2 teaspoon cinnamon
  • 1/4 teaspoon ground cloves
  • 1 egg for glaze
CANDIED ORANGE PEELS
  • 2 to 3 oranges
  • 1 1/2 cups water
  • 2 cups granulated sugar, plus extra for sprinkling


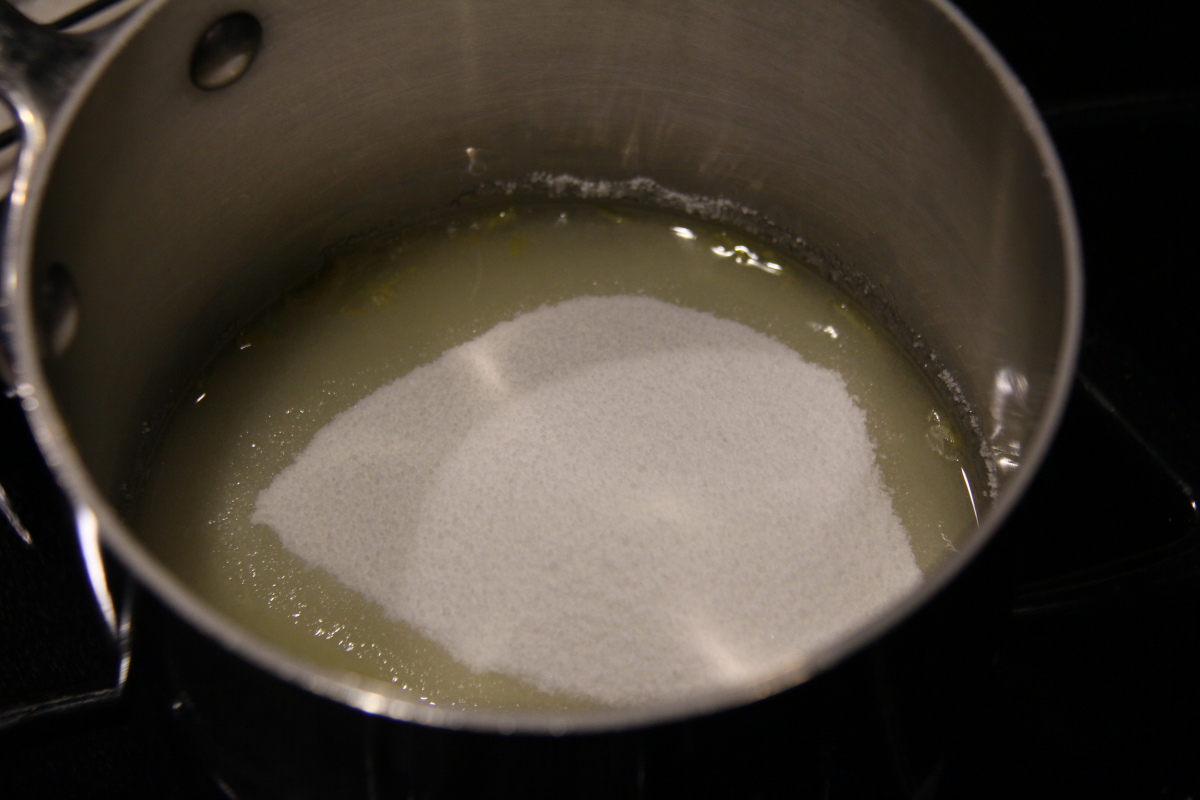
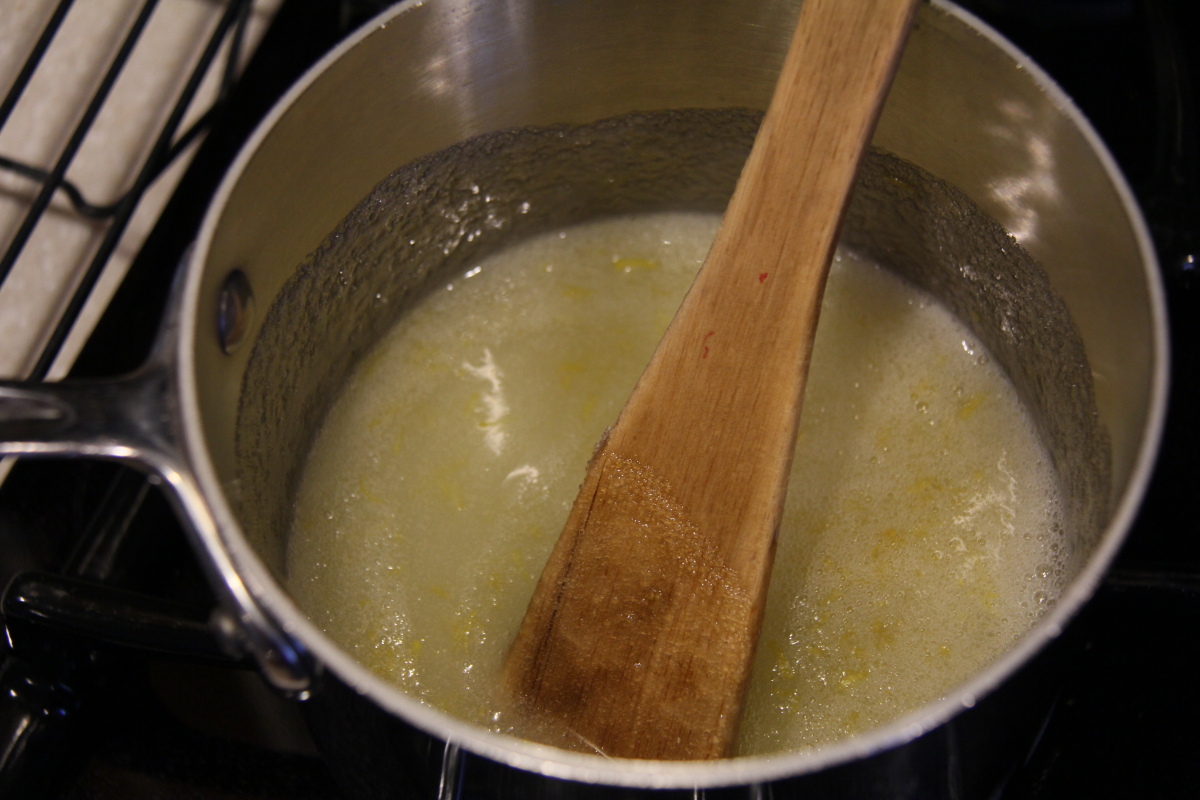
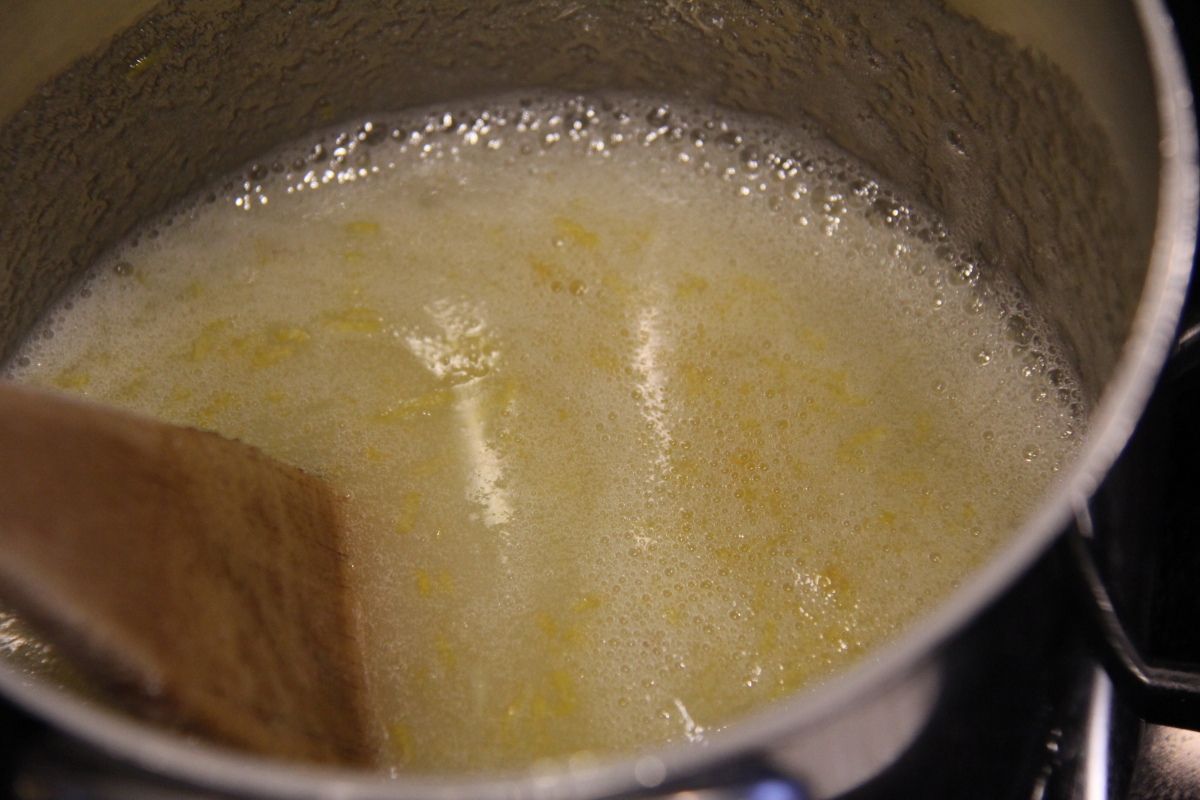
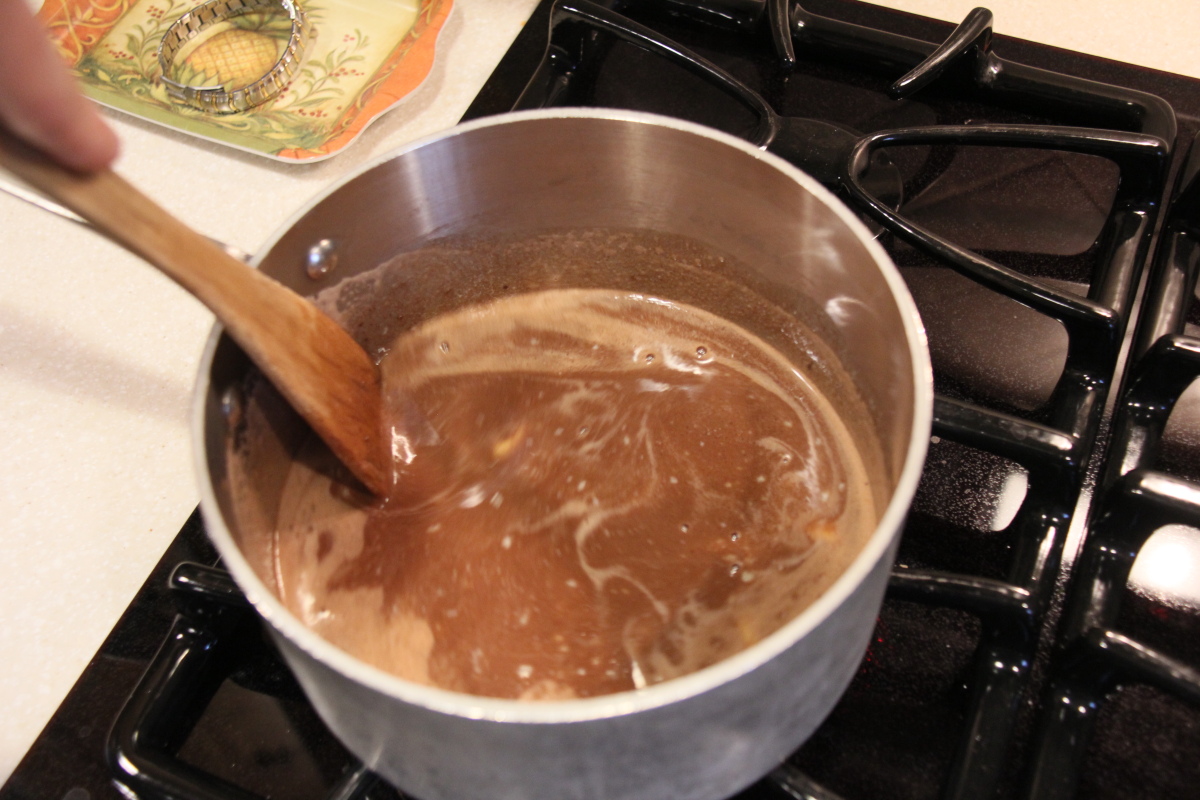
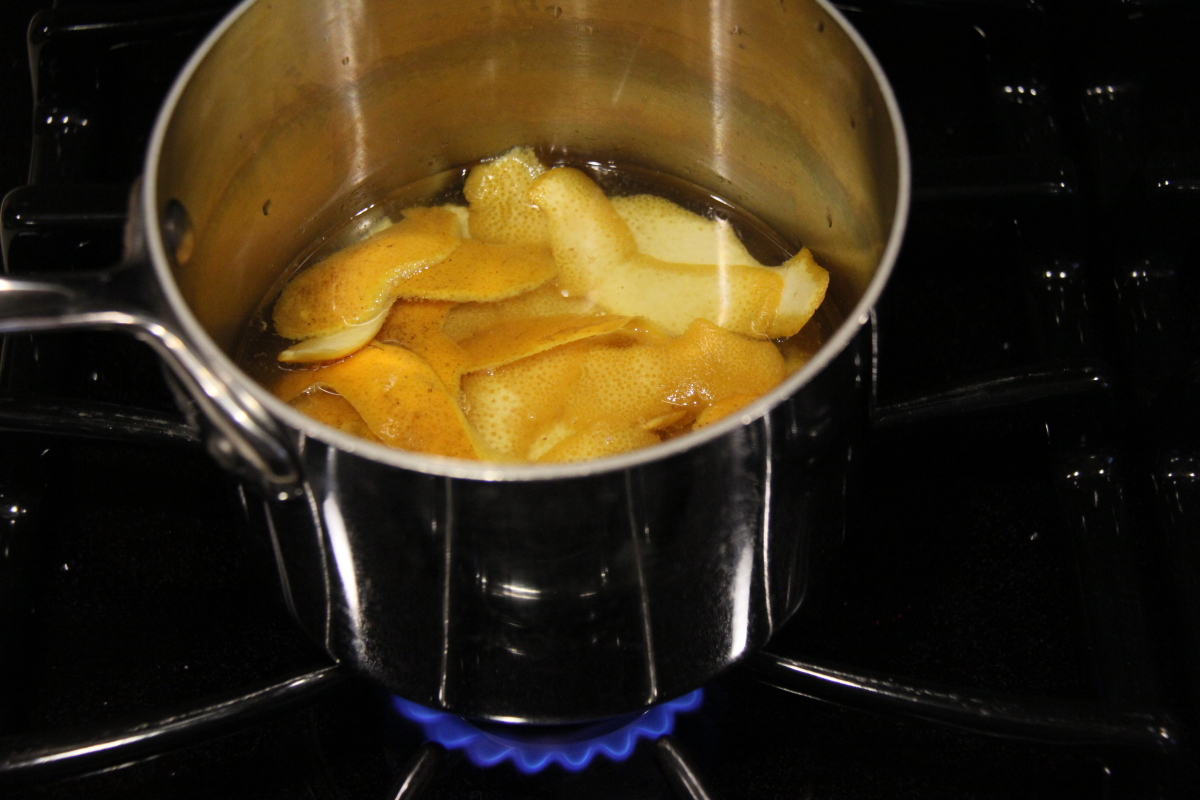
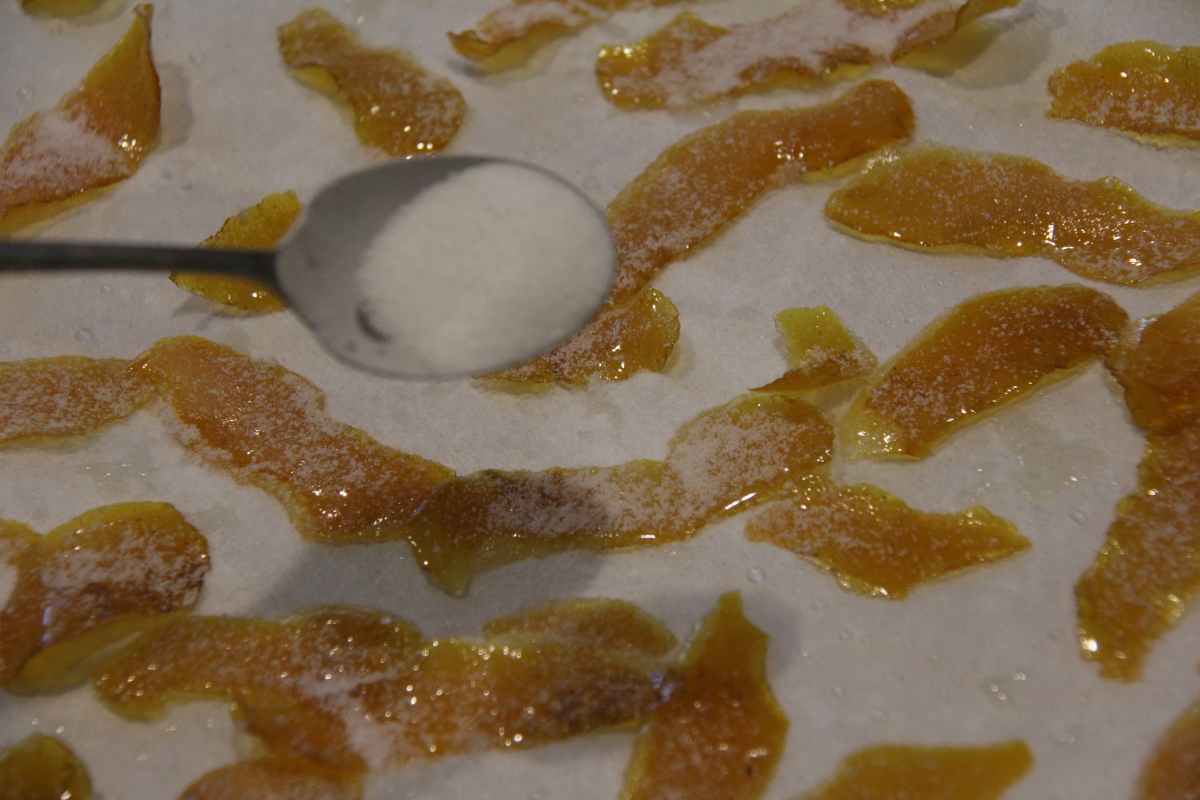
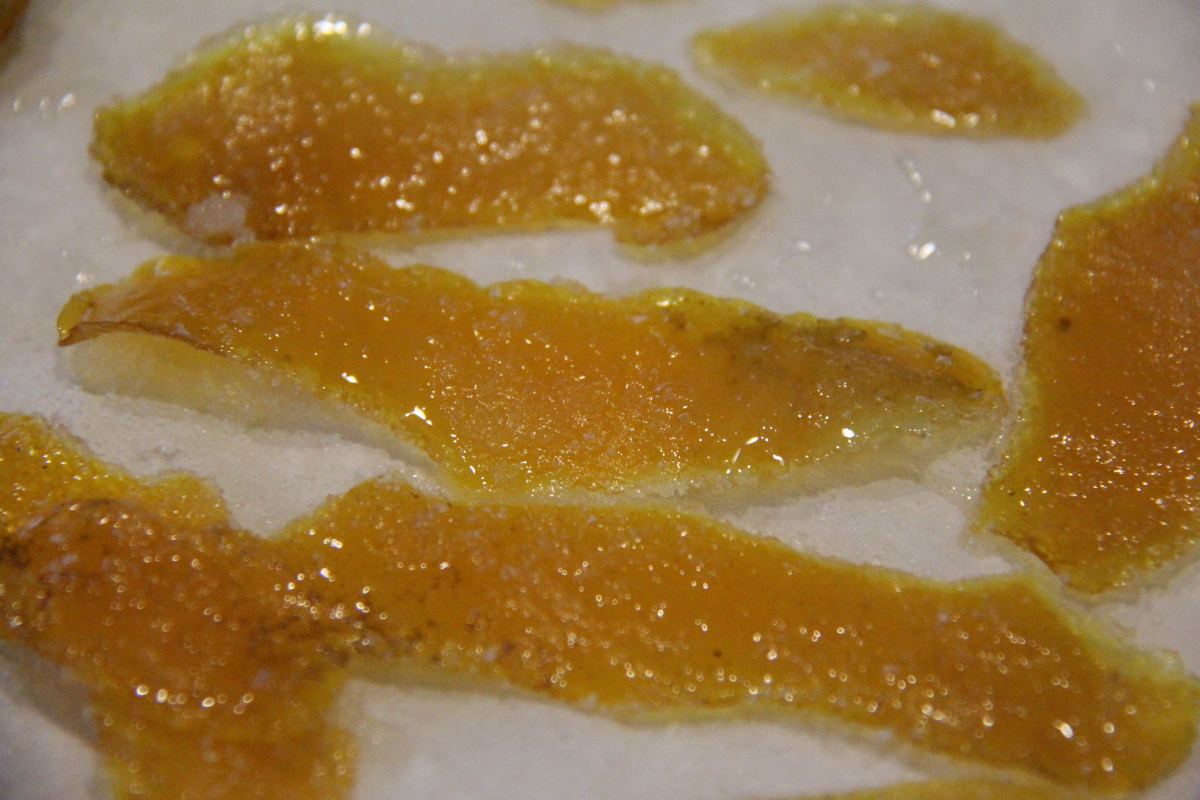
Using a potato peeler, peal the rind from 2 or 3 oranges. Place the orange peels in a small pot with 2 or 3 cups of water and bring to a boil for a few minutes.  Dump out the water and repeat. Bring it to a boil for a second time and dump out the water. Now measure 1 1/2 cups of water with 2 cups of sugar and boil slowly with the orange peels for 30 to 60 minutes. Ideally, record the temperature using a candy thermometer and stop when the temperature hits about 230F.  Then, place the orange slices on a piece of parchment paper, dusted with a light layer of granulated sugar. Sprinkle some additional sugar on top and let air dry for a few hours.

quaresimali honey almond biscot0003 quaresimali honey almond biscot0004 quaresimali honey almond biscot0005

While the orange peels are cooking, you can toast the almonds. Place the almonds in a single layer on a cookie sheet in a 350F oven for abut 10 to 15 minutes. Watch them carefully during the last few minutes as they can burn. (I can usually tell when the are done when they start to produce that wonderful almond smell.) After they have cooled, roughly chop the almonds, leaving sizable chunks.

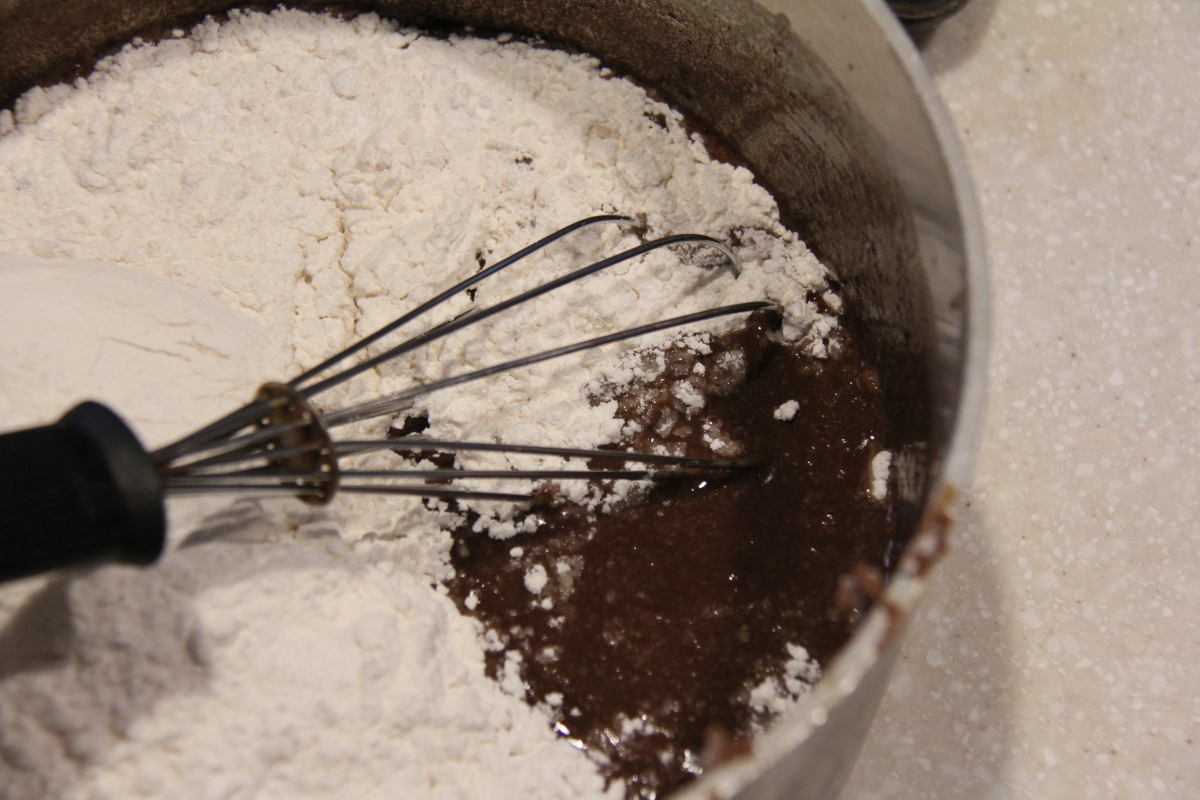
In a large bowl, combine the flour, sugars, baking powder, baking soda, cinnamon, cloves, and almonds. Whisk together until fully blended.

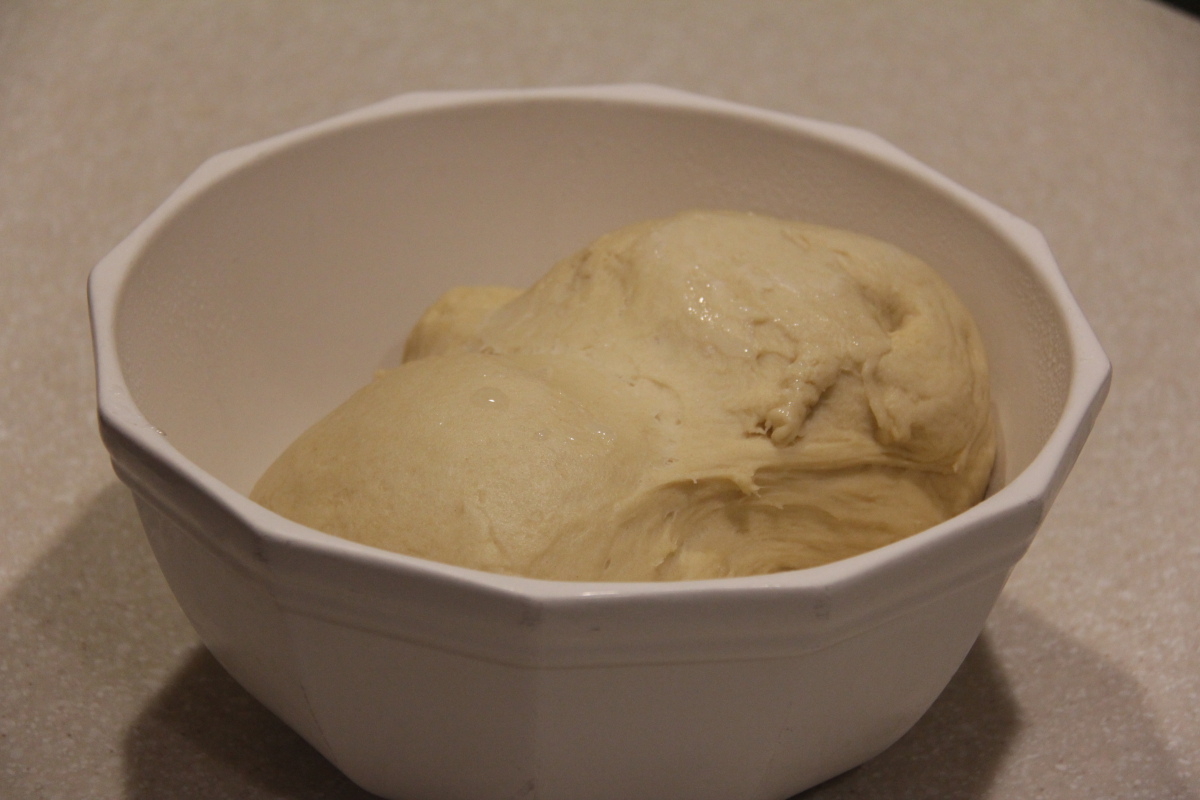
In a separate medium bowl, mix the eggs and honey. Add the egg mixture to the flour mixture. Mix at first with a fork and then with your hands. Add the chopped orange peels, orange zest, and lemon zest and continue mixing.  It should be firm but remain easy to handle.

quaresimali honey almond biscot0008 quaresimali honey almond biscot0009 quaresimali honey almond biscot0010

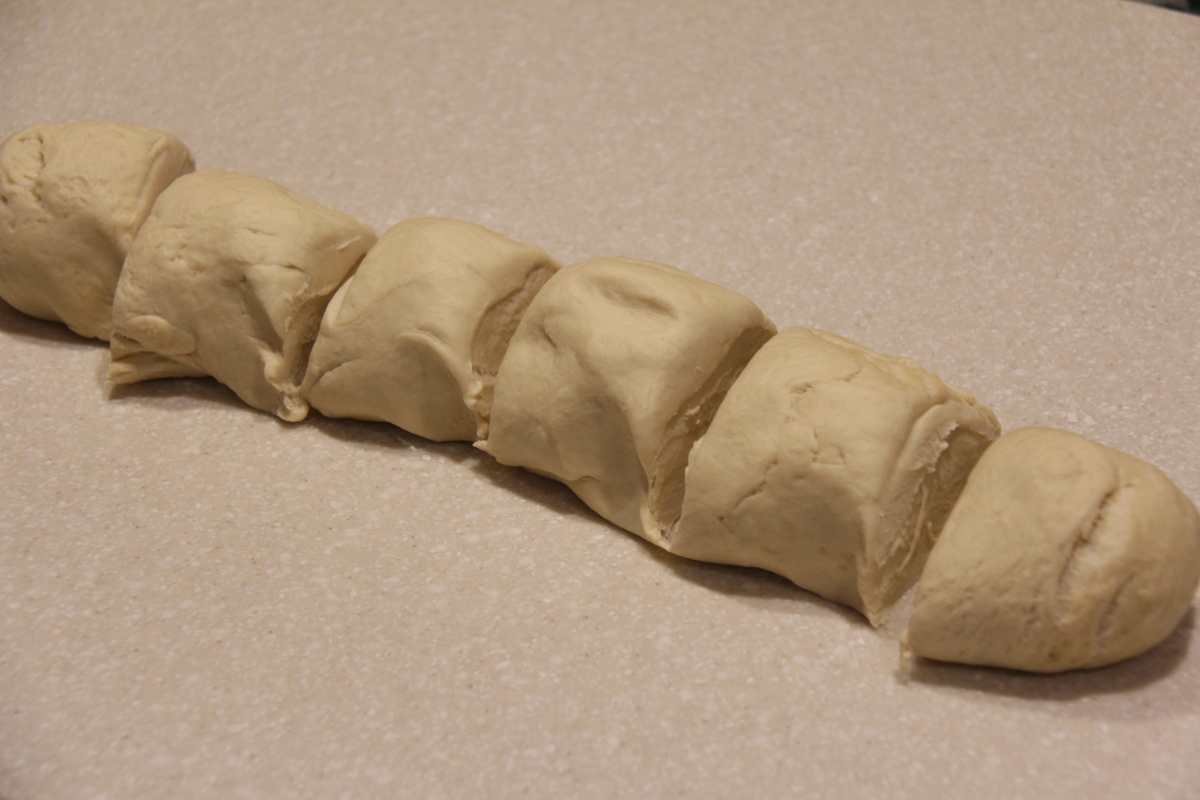
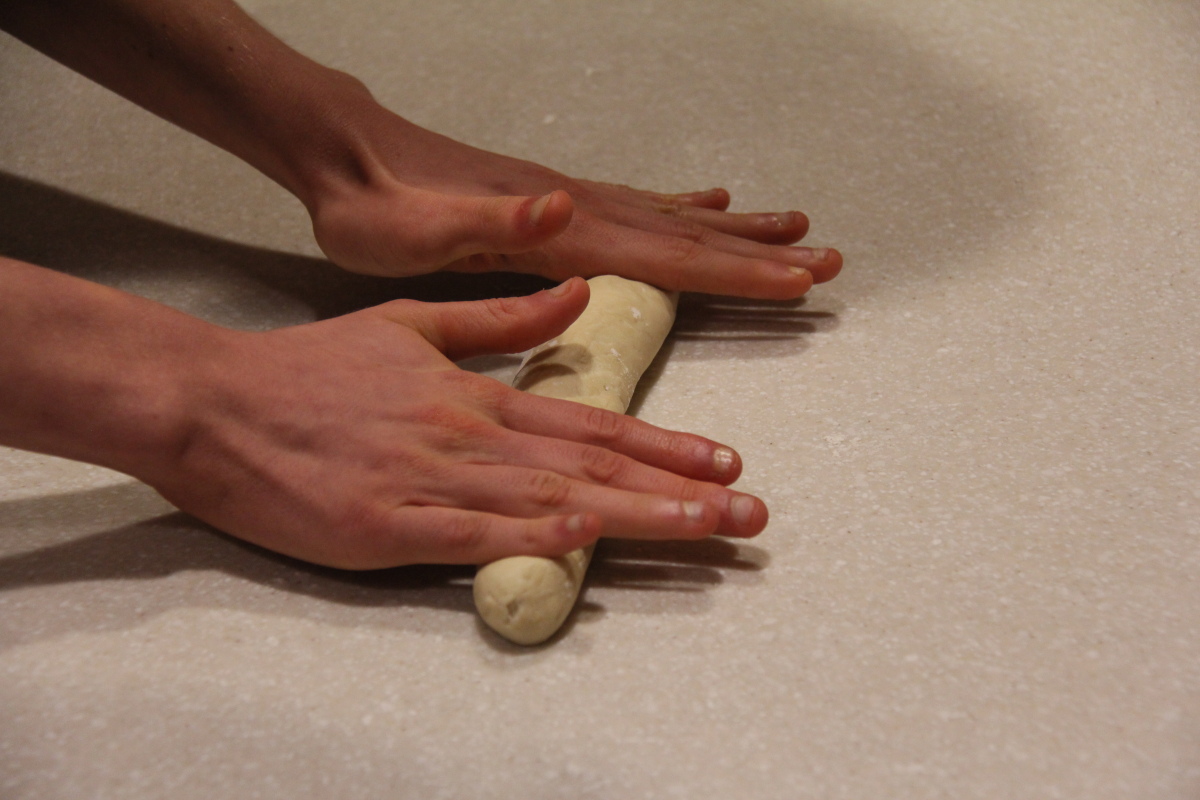
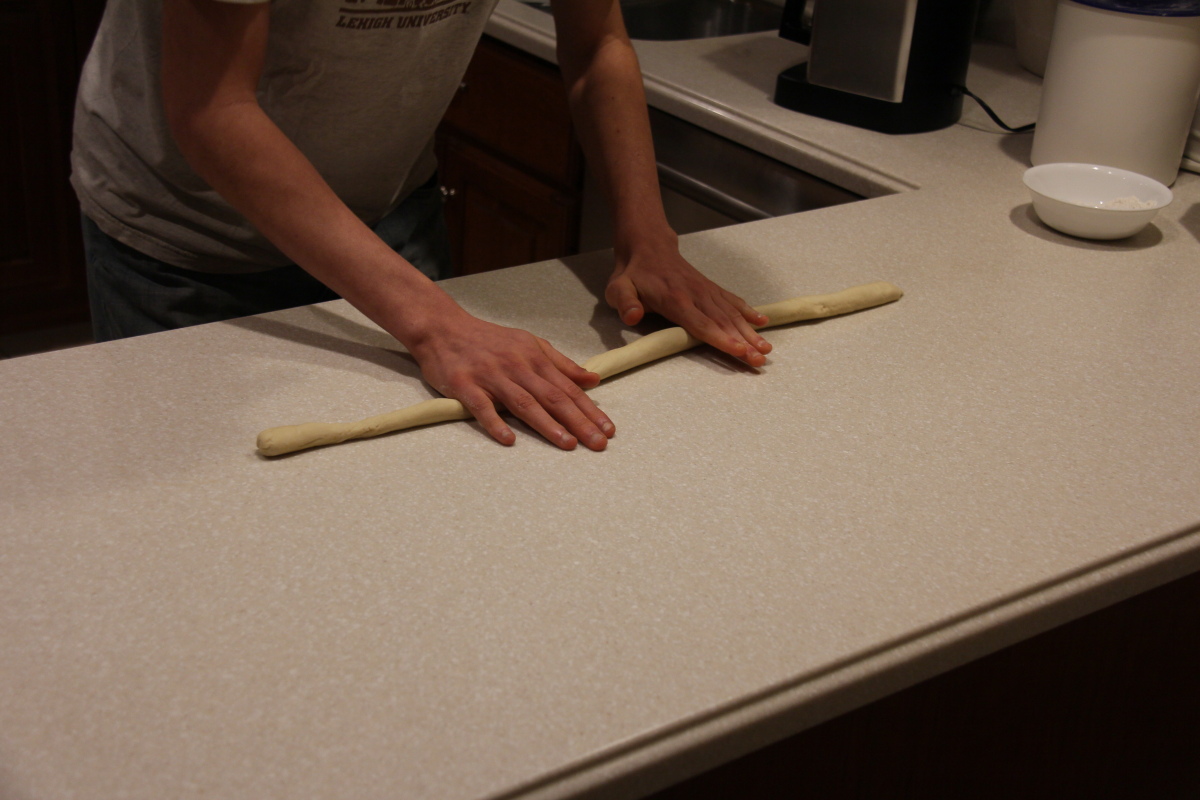
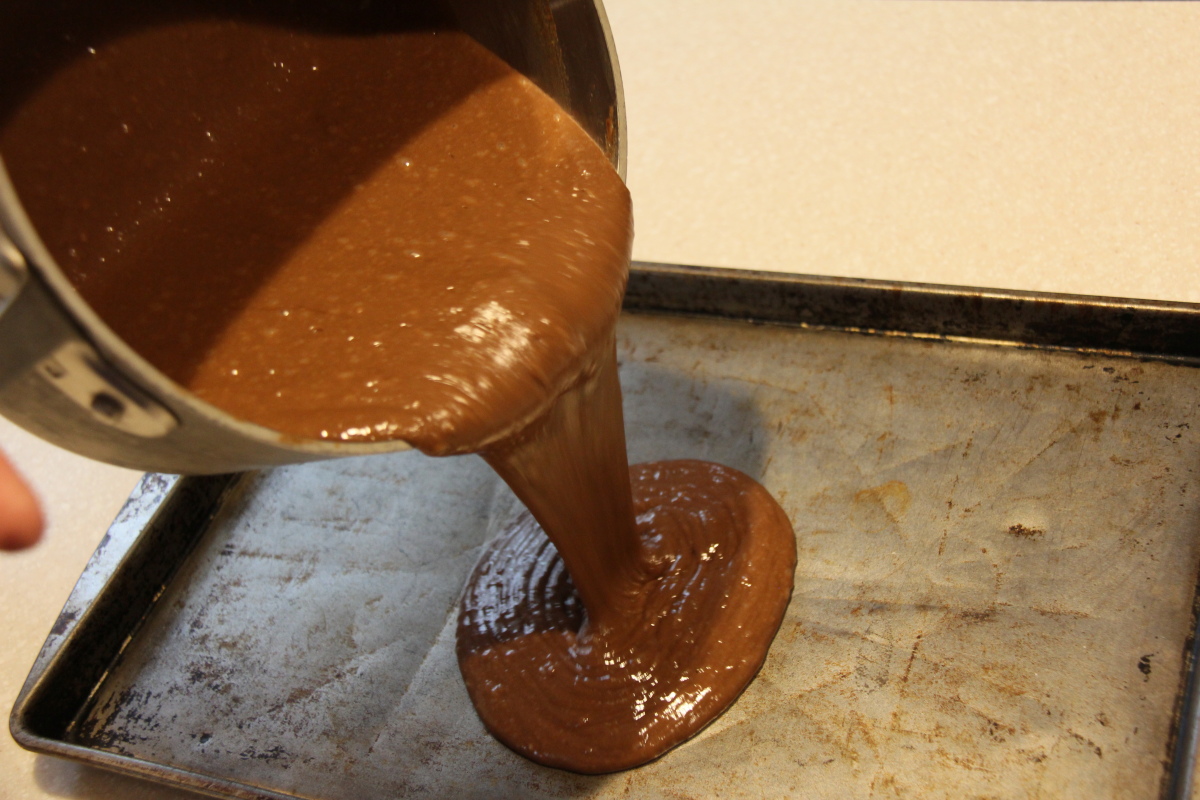
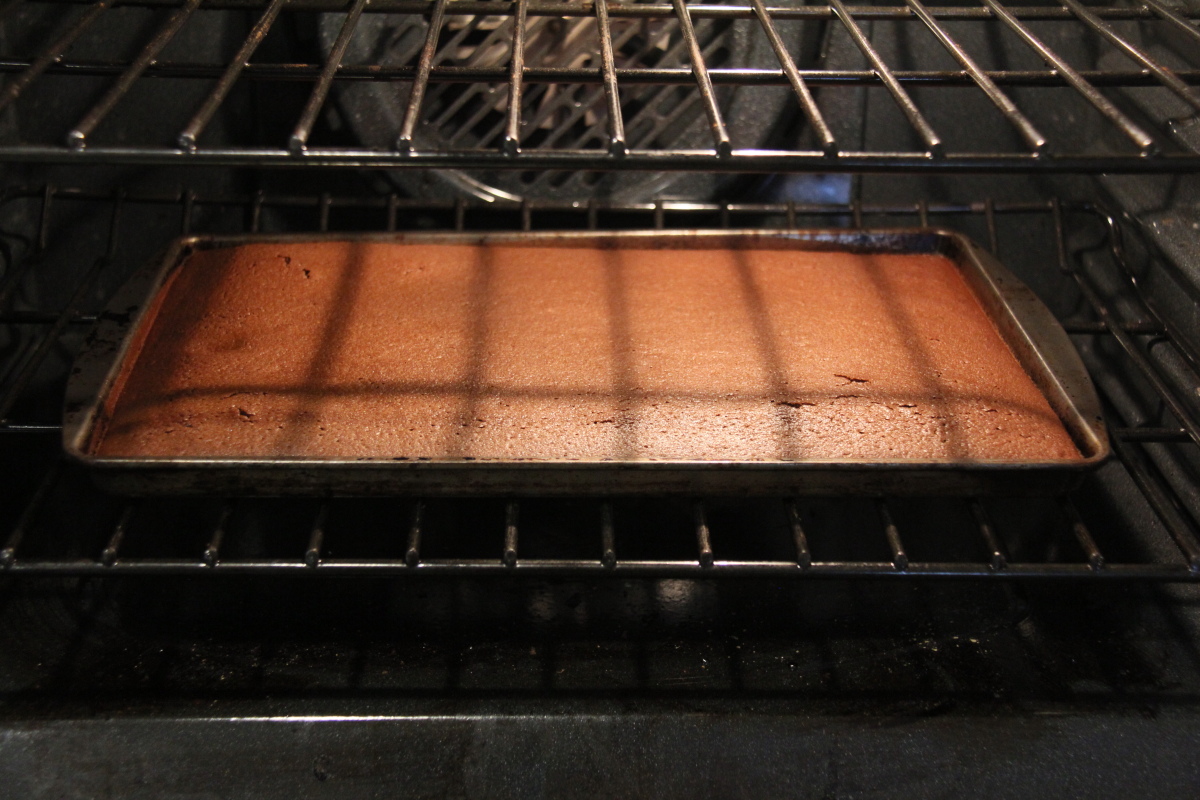
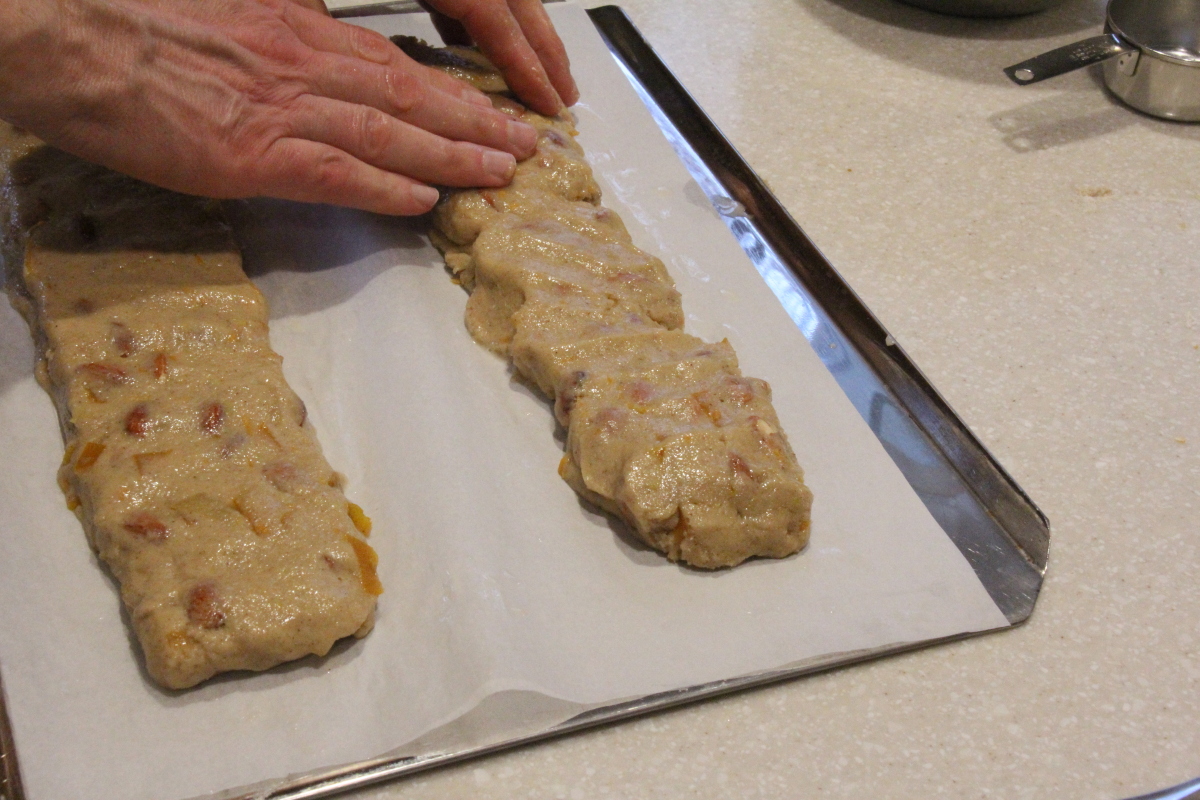
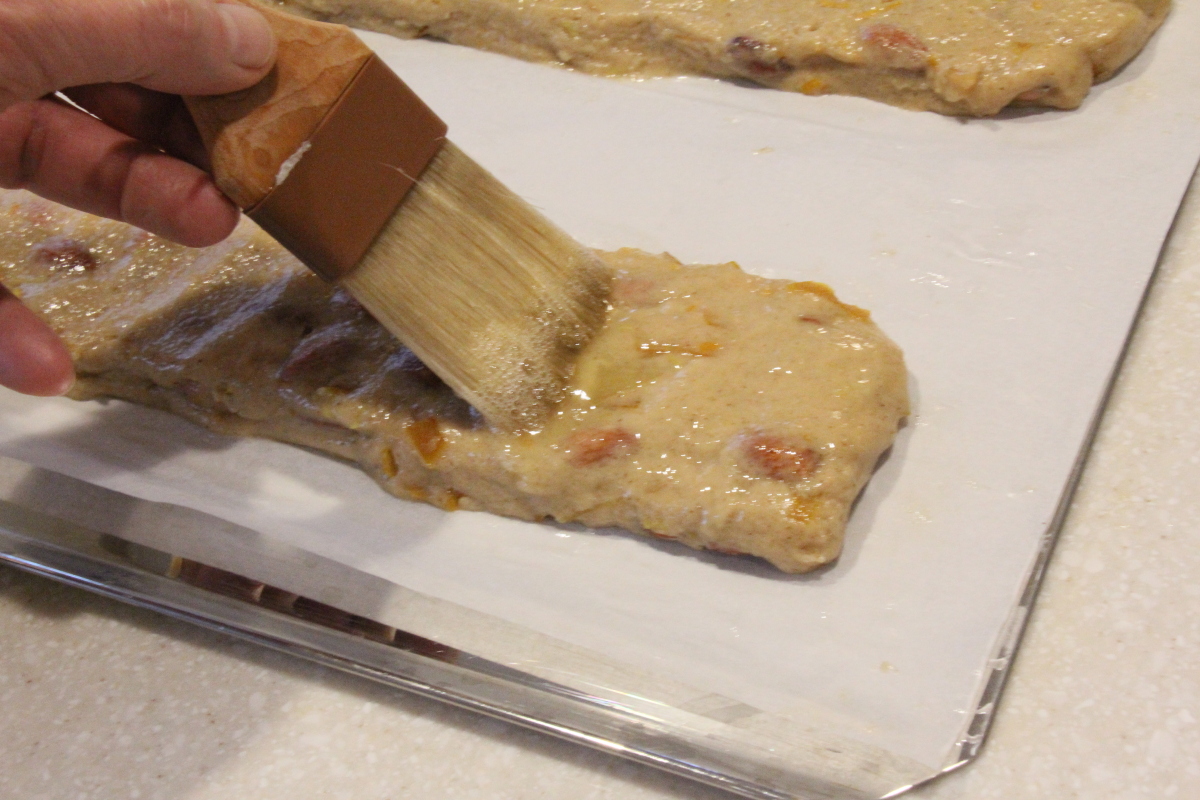
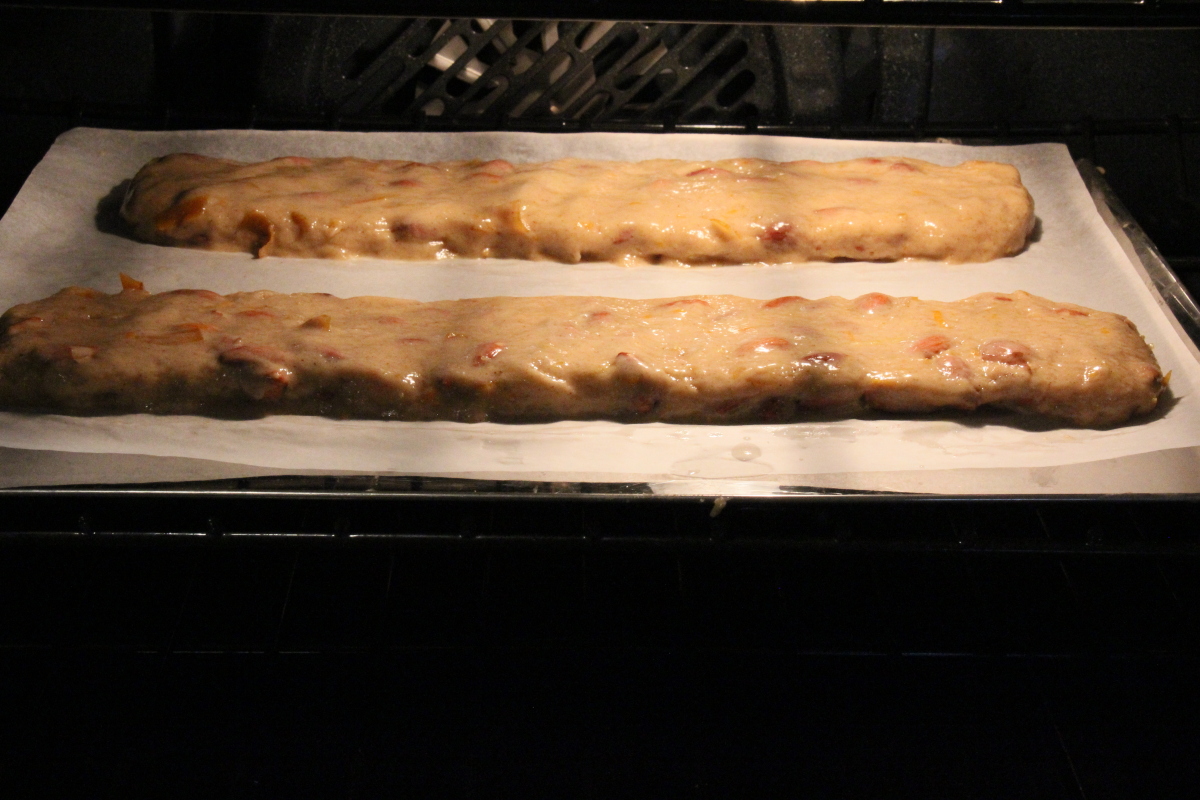
Divide the dough in half and form two logs about 14″ x 4″ x 1/2″ in size on a parchment covered cookie sheet. Brush the logs lightly with an egg wash (1 egg white + 1 tablespoon of water, beat well) and pop in the oven. Bake for 30 to 35 minutes at 350F until the biscotti becomes a light golden brown hue.

quaresimali honey almond biscot0011 quaresimali honey almond biscot0013 quaresimali honey almond biscot0014 quaresimali honey almond biscot0015

Cool on a cooling rack for about 30 minutes. Then slice at a diagonal angle using a sharp serrated knife into 1″ wide slices. (Some people like thinner slices, but  for me, I think a nice piece of biscotti should be something to remember. You only live once – enjoy!) Now place the cut biscotti back on the cookie sheet and bake at 350F for about 7 to 10 minutes on one side. Then flip each piece and return to the oven and bake an additional 5 to 7 minutes. Bake for less time if you like them softer and for longer if you like them crispier.

quaresimali honey almond biscot0017 quaresimali honey almond biscot0019

Bread and Butter Pickles

If you are lucky enough to belong to a CSA (Community Supported Agriculture – One Woman Farm in Gibsonia), you know what it’s like to be immersed in the bounty of delicious local fruits and veggies. With this latest CSA box, I was wondering what to do with a bunch of cucumbers… make pickles of course!

When it comes to pickles, I tend to prefer the sweet taste of the bread and variety so that’s what I decided to create!

IMG_6185 small

I had three nice sized cucumbers, about 2 1/2 pounds in total. Good to go.

IMG_6187 smallIMG_6189 small
IMG_6188 small

Bread and Butter Pickles

Ingredients
2 1/2 to 3 lbs cucumbers
1 to 1 1/2 lbs onion
1/4 cup salt
1 cup white vinegar
1 cup red cider vinegar
1 cup sugar
1 Tablespoon mustard seeds
1 teaspoon celery seeds
1 teaspoon turmeric

Wash the cucumbers and slice into 1/8 to 1/4 inch slices depending if you like them thicker or thinner – I go right in the middle:)  Slice the onion into thin 1/16 to 1/8 inch slices and then cut into quarters so you get pieces that are about 1 inch in length.

IMG_6196 small

Place the cucumbers and onion slices in a bowl and add the salt.  Mix it up so the salt can reach all sides of the slices.  Cover and place in a refrigerator for at least 3 hours.  When I made this batch, I had to go to work and I left them chilling all day, no problem.

IMG_6200 small

From here, I canned my pickles, but if you plan to cold pack them instead (they’ll only keep stored in the refrigerator for about 1-2 months), you can skip the canning preparation steps.

Head over to the orange marmalade post to read my comprehensive instructions on canning techniques… but here is a quick review.  Wash 4 or 5 pint canning jars.  Heat a large pot of water to boiling that will be able to cover the sealed jars.  Place the empty jars in the boiling water to sterilize them and take them out just before you are ready to fill them.

IMG_6203 small

When you’re ready to make some pickles, add the vinegar, and remaining ingredients to a 3 to 4 quart pan.  I like to use the 50/50 mixture of red wine vinegar to white vinegar for a slightly bolder taste.

Rinse and drain the cucumber/onion mixture to remove the excess salt.

Add the cucumber/onion mixture to the vinegar solution and heat.  Stir occasionally and remove from the heat just as the mixture starts to boil.

IMG_6209 small

Ladle the pickle mixture into each of the jars, filling to within 1/2″ from the top of the jar.  Clean the rim using a paper towel. Place on the top and screw the ring on tight.  I find it helps to use a towel to hold onto the hot jar.

IMG_6211 small

Place the jars into the boiling water and make sure there is at least 1/2″ – 1″ of water covering the jars.  Boil for 10 minutes and remove the jars using jar tongs.  Set your jars on the counter and within 2 to 15 minutes, you should see and hear each lid pull down.  If a lid doesn’t pull down, you should refrigerate that jar and enjoy those pickles first!

IMG_6212 small

Grill up a nice burger and add some fresh tomato with your homemade bread and butter pickles – nothing better!  Enjoy!

Strawberry Jam

Spring is in the air, and I’m more than ready for warm weather produce. Say hello to these beautiful, juicy strawberries:)

IMG_4445 small

After eating my fill of a BIG box from Costco, I needed to transform these lovlies into something delicious before they went bad. JAM was the answer!

IMG_4448 small

I decided to make two versions –  a small batch with less sugar and lemon zest and the other regularly sweetened plus lemon juice.  The one with the zest had a slight lemony kick, and the second is your classic strawberry jam.

IMG_4447 small

Here are some of the tools and equipment you’ll need if you plan on canning the jam:

  • 8 – 10, 8oz canning jars and lids
  • 2 big pots
  • ladle
  • funnel
  • candy thermometer
  • canning tongs

Strawberry Jam Version 1: Lemon Zest + reduced sugar

2 cups sugar
1 lemon – zest and juice (about 1/4 cup)
3 cups strawberries -halved

Strawberry Jam Version 2: Classic

7 cups sugar
1/4 cup lemon juice
5 cups strawberries

Cook the lemon and sugar for about 10 minutes.

IMG_4446 small

IMG_4453 small

IMG_4454 small

Then, add the strawberries and cook for another 20 minutes, stirring every 30 to 60 seconds.

IMG_4455 small

Place a candy thermometer into the mixture, making sure it does not touch the bottom of the pan. The one I use has an adjustable clip on the side so it can attach to the side of the pot and stay in the mixture as it cooks.

IMG_4456 small

Stir the mixture every 30 to 60 seconds and cook until the temperate reaches 230 degrees F and jam is thick when placed on a cold plate. (FYI: The temperature will sit at about 210F for a long time and then slowly increase, so don’t get discouraged! Make sure you keep your eye on the thermometer because the temperature will rise faster as it approaches the final temperature.)

While the berries are cooking, prepare your canning pot by filling a second large pot with water, leaving enough room for the jars so the water does not overflow when they are added. This pot should be large enough to hold 8 to 10 canning jars with about 1 inch of water above the tops of the jars. Place a small rack or even a piece of cloth at the bottom of the pot so the jars don’t come into direct contact with the bottom of the pot while canning. To sterilize the jars, place the clean, open jars (no lids) into the water along with a ladle and funnel that you’ll be using to fill the jars. Boil the jars for about 10 minutes. Turn off the heat and add the lids. Let them sit until you’re ready to can.

About 15 minutes or so before the jam is done cooking, use your canning tongs to remove the jars and lids from the canning pot and place them upside down on a clean dish towel. Turn the heat back on the canning pot so that the water is boiling when the jam is ready.

IMG_4465 small

IMG_4849 small

Once the jam reaches 230F, remove the pot from the heat. Fill each of the canning jars with the jam to about 1/4″ from the top. Wipe the top edge of the jar with a damp paper towel to remove any jam that may have dripped. Place the lid on the jar (gasket side down) and screw on the band – medium tight.

With your canning tongs, place the jars standing up onto the grate or towel in the boiling water in the canning pot. Make sure the jars have about 1″ of water covering the lids. Boil for 10 minutes. Then, remove each jar and place back on your counter to cool. In about 5 to 20 minutes, each of the lids will snap inwards, indicating that the jars are sealed and the vacuum has formed.  Write the date on top and enjoy!

New Year’s Pretzel

Growing up, we would make New Year’s Pretzels and give them to friends and neighbors to celebrate the new year. The dough is straight forward and easy to make. The fun comes when rolling the dough and making a pretzel. We had one of our nephews helping to make them this year. Its a great activity for the family as everyone can make their pretzel a little different.

New Years Pretzel 0001

New Years Pretzel Dough

1 package (2 teaspoons) active dry yeast
1 1/2 cups warm water (110 deg F)
2/3 cups sugar
1 1/2 teaspoons salt
2/3 cup melter butter
2 eggs
1 cup lukewarm mashed potatoes
7 to 7/12 cups flour

Icing

1 cup confection sugar
1/2 teaspoon almond extract
1 to 2 tablespoons milk

To start, zap the water for about a minute in the microwave so that it is warm to the touch, about 110 degrees F.  Add in the yeast and whisk slightly to dissolve the yeast.  Add the water/yeast mixture to your mixing bowl and add the next 5 ingredients mixing as you go. Using mashed potatoes helps to make the dough firm and moist. Then, add in about 5 cups of flour. Switch to a dough hook and add the remaining flour and knead with the dough hook or by hand for about 5 minutes. Place the dough in a greased bowl, cover tightly and refrigerate for 4 to 12 hours.

New Years Pretzel 0003

When you are ready to make the pretzels, cut the dough into 4 to 6 pieces depending on how big you want each pretzel. I did 6 for this one and was able to make each about 12″ in diameter. You will need a wide space to start rolling out the dough. You need only a little flour as too much flour will cause the dough to slide on your work surface and it will be hard to roll.

New Years Pretzel 0004 New Years Pretzel 0006

Roll one piece until it is 36″ to 48″ long and abut 3/4 to 1″ in diameter.

New Years Pretzel 0010

I’ve discovered you always have to make it longer than you think and don’t forget the dough will increase in diameter by 2 to 3 times, so if it looks thin, that’s OK.

New Years Pretzel 0011 New Years Pretzel 0013

Place the center portion on a greased tray

New Years Pretzel 0014 New Years Pretzel 0015

and then flip the two ends once twice and then attach the ends on the sides of the big loop.

New Years Pretzel 0021

Next we have to let the pretzel rise in a warm space with lots of humidity.  I like to warm the oven slightly (around 100 deg F) and place a jelly roll pan in the bottom with a cup or two of boiling water to keep the humidity nice and high in the oven. Perfect! Let the pretzels rise for 1 to 1 1/2 hours.  You can see in the photo above how much the diameter increased.  Then bake at 400 degrees (375 convection) for 9 to 11 minutes, just until the crust is a golden brown.

New Years Pretzel 0026

Cool on wire racks.

New Years Pretzel 0024

Mix up the icing so that it is firm and not too runny. I like to use a pastry bag or zip lock bag with a corner cut off,  to decorate the pretzel with the year and what ever else you want to write – this is your pretzel! The ones you get in the stores typically coat the entire top with icing, if you like icing, that’s a good way to go.  Me- I like to eat them with a little butter. Ymmm…

New Years Pretzel 0031

There is nothing like some tasty New Year Pretzel to start the new year.

New Years Pretzel 0033

Beats the cold outside every time.

Texas Sheet Cake

I don’t know where my mom acquired this recipe, but it is definitely a family favorite. The sheet cake is not as dense as a brownie but when combined with the decadent chocolate glaze, it delivers a solid chocolate hit. Plus, no mixer or bowls required. All you need is a 3 quart pot and a jelly roll pan to create this fast, simple, and delectable dessert!

IMG_3865 Texas sheet cake

IMG_3816 Texas sheet cake IMG_3819 Texas sheet cake

Cake

8 oz (2 sticks) butter
1 cup water
1/4 cup cocoa powder
2 cups all-purpose flour
2 cups granulated sugar
1/2 teaspoons salt
2 eggs
1 teaspoon baking soda
1/2 cup sour cream

Preheat your oven to 375F. Combine the butter, water, and cocoa in a 3 quart sauce pan and bring to a boil.

IMG_3821 Texas sheet cake IMG_3824 Texas sheet cake

Remove from the heat and stir in the remaining ingredients.

IMG_3826 Texas sheet cake IMG_3829 Texas sheet cake

Pour the batter into a 11″ x 17″ jelly roll pan.  You’ll bake the cake at 375 F for 22 minutes, but start making the glaze when there are about 5-10 minutes left on the timer. We want to pour our icing on a HOT cake:)

IMG_3845 Texas sheet cake

After 22 minutes, the cake should be finished baking. To make sure it’s done, press gently on the surface, and it should easily bounce back.

IMG_3841 Texas sheet cake IMG_3844 Texas sheet cake


Glaze

4 oz (1 stick) cup butter
6 tablespoons milk
1/4 cup cocoa powder
4 cups powdered sugar
1 teaspoon vanilla extract
1/2 cup chopped walnuts (optional)

Combine the butter, milk, and cocoa in a sauce pan and bring to a boil. Remove from the heat and stir in the remaining ingredients. (I don’t always use nuts because of friends/family nut allergies, but they do add a little crunch to the icing.)

IMG_3852 Texas sheet cake IMG_3853 Texas sheet cake

The cake should now be out of the oven. Pour the glaze on the cake while both the cake and glaze are hot. Spread the glaze quickly and evenly. Let it cool.

IMG_3856 Texas sheet cake IMG_3864 Texas sheet cake

You can cut the Texas sheet cake into bars about 1.5″ by 2.5″. Sometimes I will use a pizza cutter- put a little butter on the wheel and cut away to make swift and smooth cuts. Enjoy!

texas sheet cake IMG_2107